As explained in another blog post, Oracle is becoming a cloud company.
In this post I'm gonna show you how to setup a NFS storage in the Oracle Cloud Infrastructure using Linux Storage Appliance.
Prerequisites
- Account on the Oracle Cloud Infrastructure.
- Create private and public keys ( check the previous post in the section Create private and public keys)
Setup NFS
To achieve this we need to perform several steps :
- Define a Virtual Cloud Network and related firewall rules
- Download and import in your OCI tenant the Linux Storage Appliance image.
- Install a Linux Storage Appliance instance and create a NFS storage.
- Mount on other instances.
Let's see step by step to see how to setup it.
Define a Virtual Cloud Network
First of all we need to define a VCN (Virtual Cloud Network) in our Comparment. To do this go in the Network tab and create a new VCN like in the figure :

Let the OCI create for you:
- subnets (each for all the Availability Domain )
- routers
- Internet Gateway
Once created you can modify your firewall rules to allow external access to the instances that will be created in that VCN. For example you should open the port 22 for the ssh access.
Just type on the the new VCN and on the left you can create new security list or modify the default one.
This table ( look here to have more details ) shows the ports that you probably want to open.
| Service | Destination Port Range | Protocol Type | Function |
| NFS | 111 | TCP | NFS |
| NFS | 2049 | TCP | NFS |
| Mountd | 111 | UDP | Autofs/Showmount |
| Httpd | 443 | TCP | HTTPS |
| Mountd | 20048 | TCP | Autofs/Showmount |
| SSH | 22 | TCP | SSH |
Donwload and import in your OCI tenant the Linux Storage Appliance image
First we have to download the Linux Storage Appliance image from the Oracle site.
Then go in the Storage tab and in the Object Storage section create a new Bucket like in the figure below:
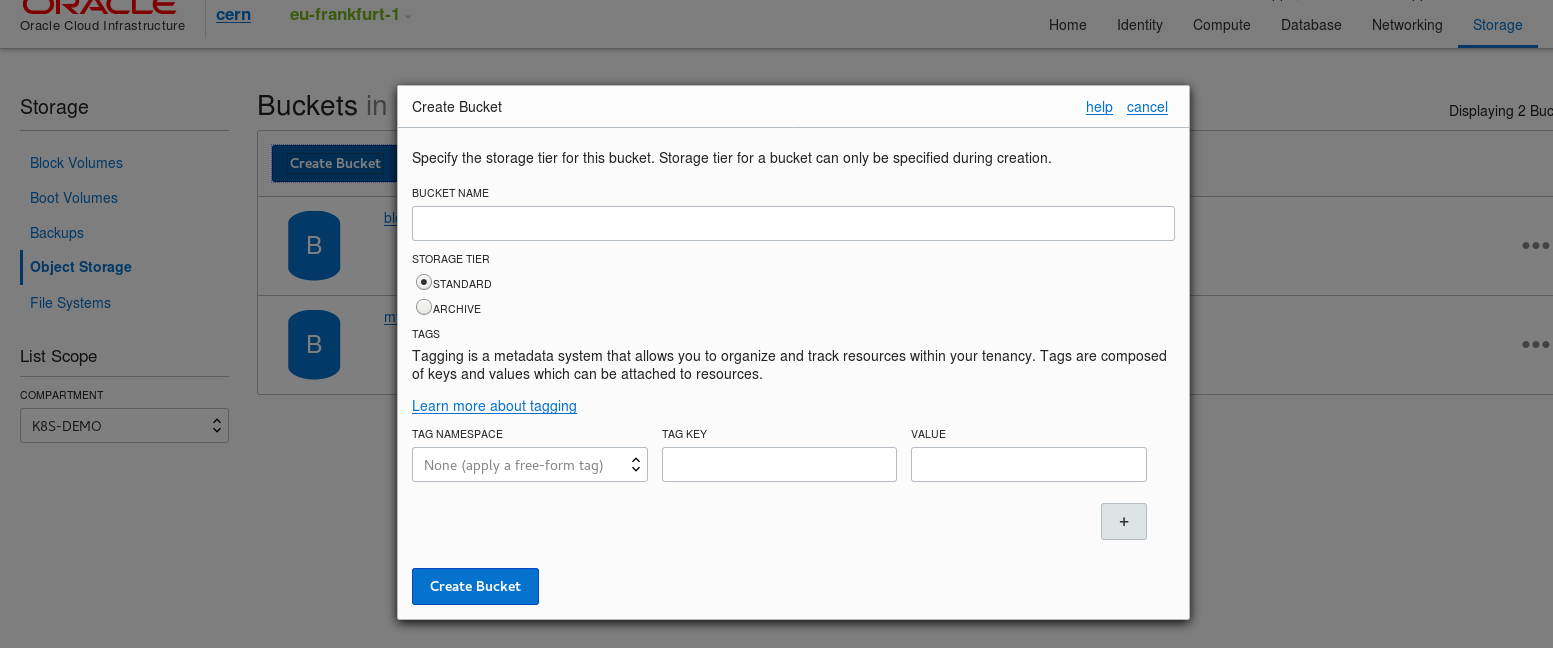
Click on the bucket just created, and upload the image that you just downloaded.
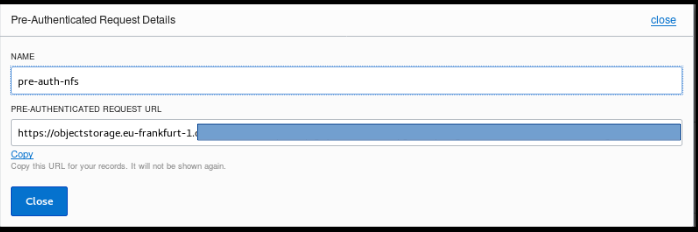
Create the pre-auth from the object just created like in the picture :

Select just read access and create the pre-authenticated request. Save the URL that it will show you because it will be needed to create the image.
Let's create an instance of the Oracle Linux Storage Appliance.
First go in the Compute tab and select Custom images and click on Import Image. Fill the form like in the image :
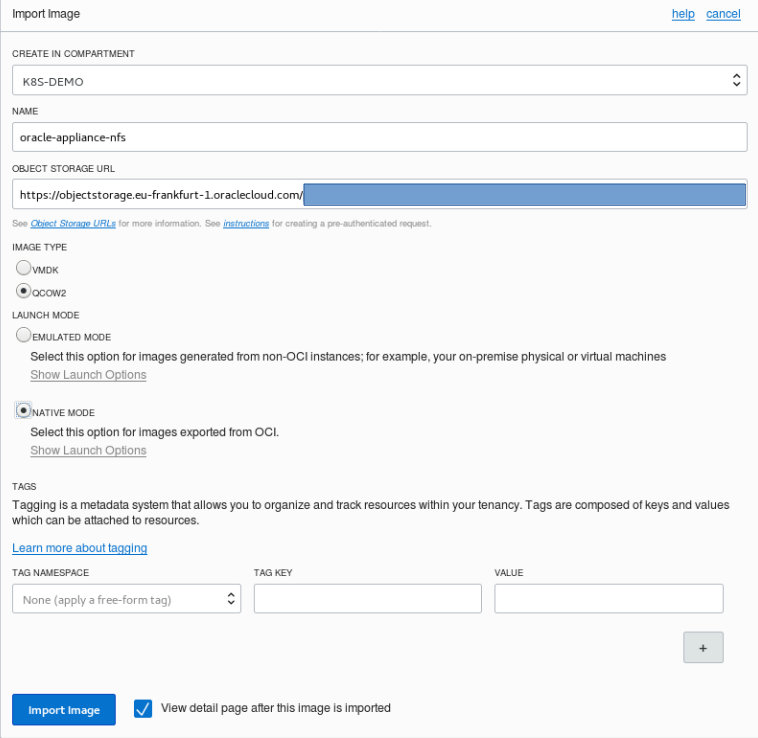
In the Object Storage URL insert the pre-authenticated request URL that you saved before.
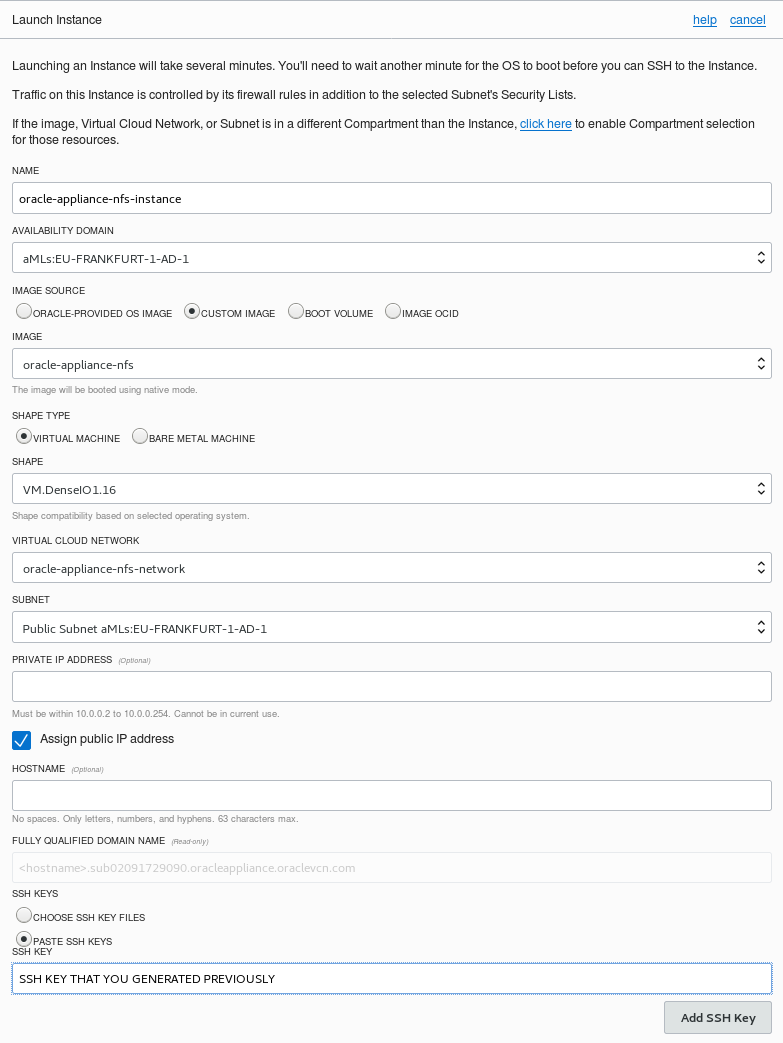
Once the image will be created you just need to create an instance from the new image ( Compute tag and Launch Instance) with a flavor that is among the following :
- BM.DenseIO2.52
- VM.DenseIO1.8
- VM.DenseIO1.16
- VM.DenseIO2.8
- VM.DenseIO2.16
- VM.DenseIO2.24
Once the VM is up, create a ssh tunnel with this command:
$ ssh -i ~/.oci/oci_api_key.pem -N -L 10000:127.0.0.1:443 opc@PUBLIC_IP
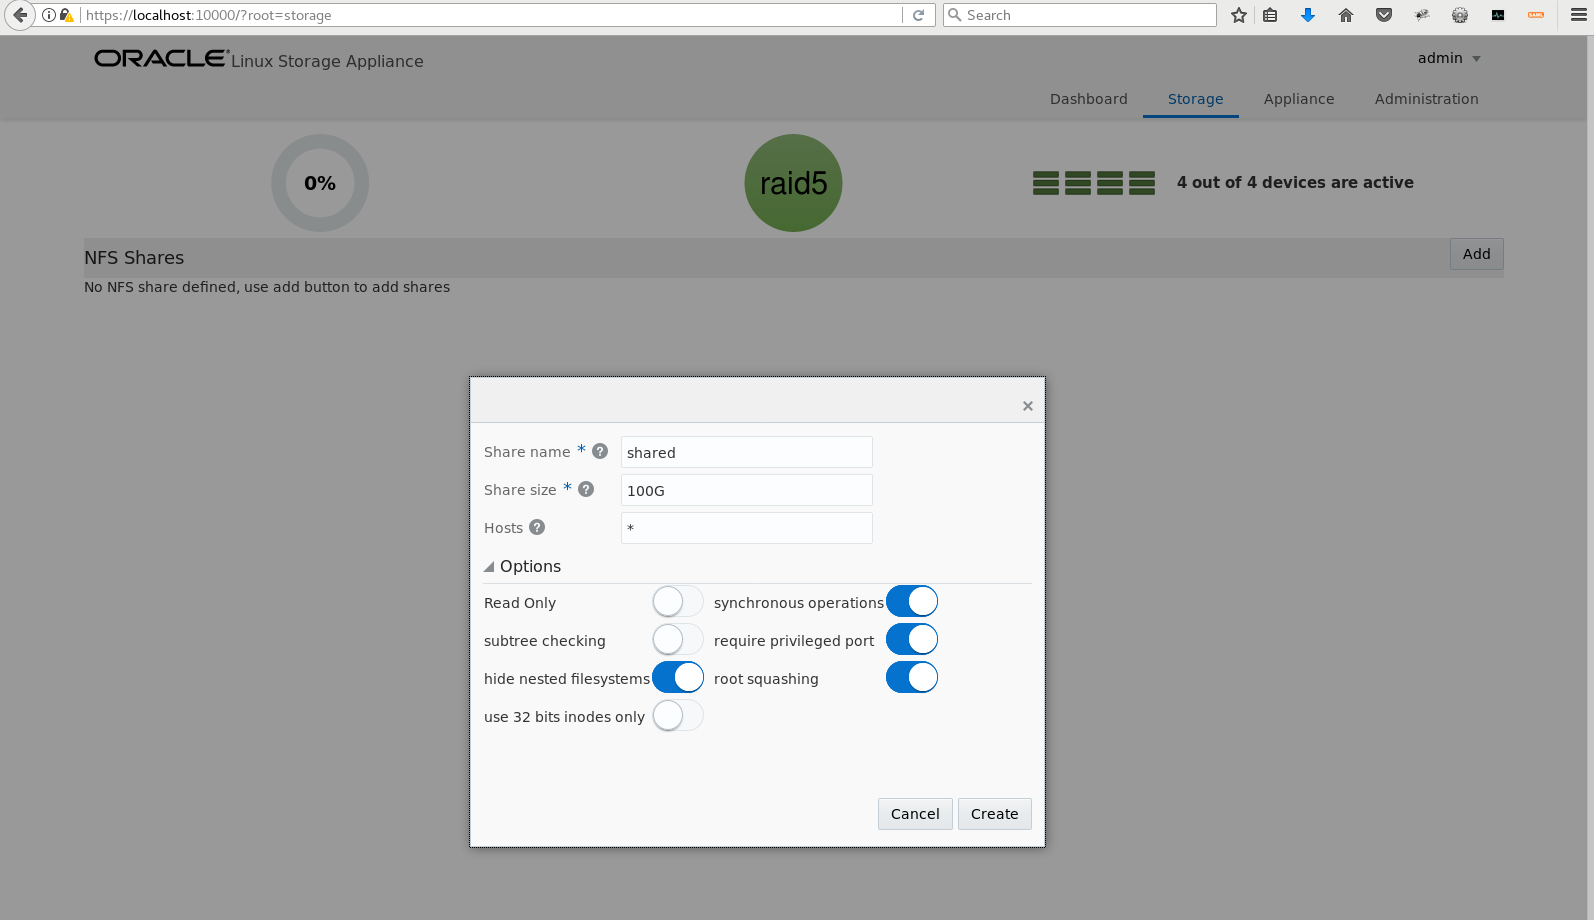
Now from the browser connect to https://localhost:10000 and accept the self-signed certificate. Then create the NFS storage like in the picture :
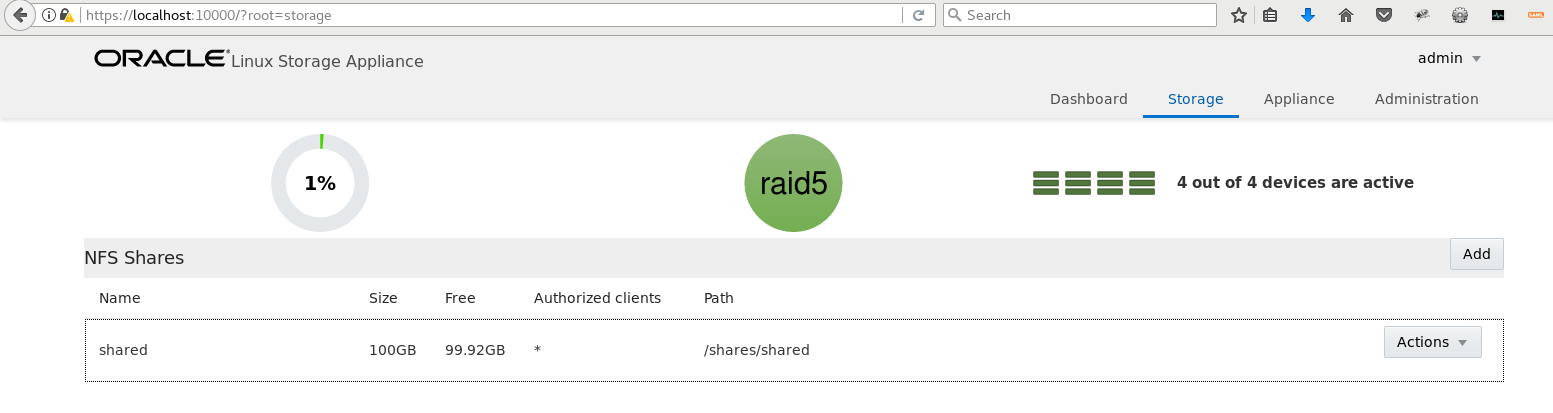
After it should look like in the below picture :
Now what you need to do it is to connect the clients to this NFS server. If you have other machines in the same compartment , you can mount from them the shared storage with :
$ yum install -y nfs-utils
$ mkdir -p /PATH/WHERE/MOUNT/NFS
$ mount NFS_PRIVATE_IP:/shares/shared /PATH/WHERE/MOUNT/NFS
Your nfs server is setup and mounted on your instances! Congratulations!